Quick start guide
A quick start guide (included in paper form in your Dcare KitKit) shows you the first steps to follow, from receiving your equipment to logging on to theDcare application. It is available here.
1. Turning on the Box
Check that your Dcare Box is powered on and connected to the Internet via the cable provided.
Preamble
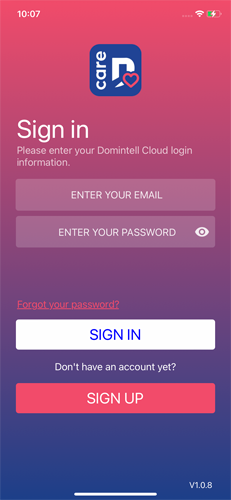
Before starting the installation, your application will prompt you to Create a Domintell Cloud account.
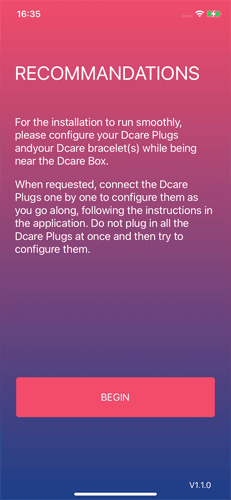
Afterwards, the application gives you some indications and essential recommendations about your installation process.
Then touch " Next" .

2. Scan your devices
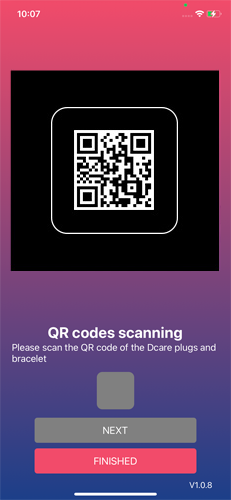
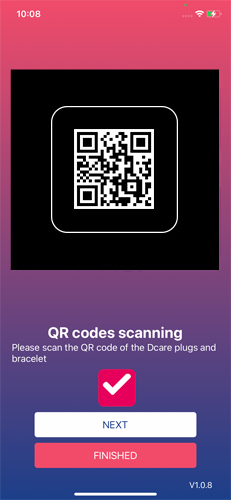
When you access the device management screen, the list is empty and you can use the "+" to enter new devices to add to your installation. The application then opens your camera to scan your devices. Take your Box Dcare and scan its QR code (via your smartphone, but always from the Dcare app), then touch " Next " . Then repeat the operation with the QR Code of each Plug and bracelet.
3. Validation of the scan
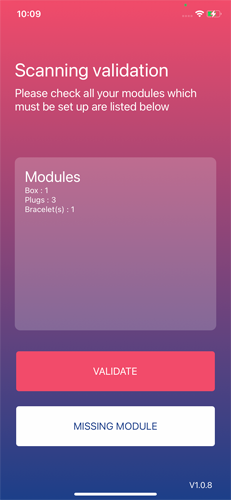
A summary screen allows you to verify that all your devices have been scanned.
If a device is missing, you can touch the "+" sign to add it.
4. Association du bracelet
Then comes the bracelet Dcare.
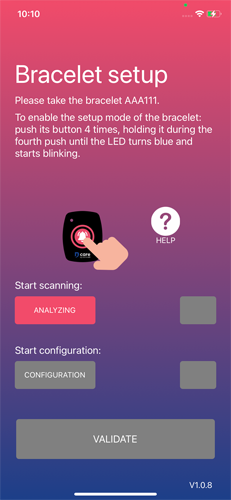
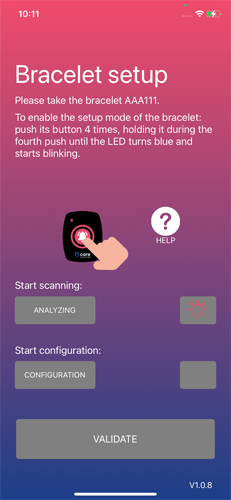
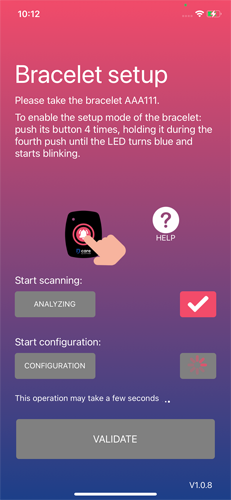
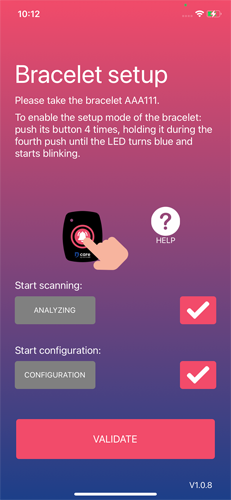
This screen asks you to take the bracelet (which you scanned in step 2) to switch it to mode association mode then configure it.
To do this, press 4 times in a row the button, while maintaining the fourth press until the LED turns blue and flashes.
Then touch the button to start theassociation in an animated screen showing the steps involved.
Repeat for every other bracelet.
5. Plug association
Now it's the turn of Plugs Dcare to be associated.
The operation is similar to the bracelet Dcare (step 4), except that the Plug Dcare Plug must be plugged into a socket as close as possible to the Box Dcare for the duration of the association.
Repeat the operation as many times as you have Dcare Plugs. A confirmation message tells you when to move on to the next Dcare Plug.
Warning: The Dcare plugs Plugs must be plugged into the same socket close to the Dcare Box. They must not be placed throughout the home at this stage.
6. Positioning of the Plugs
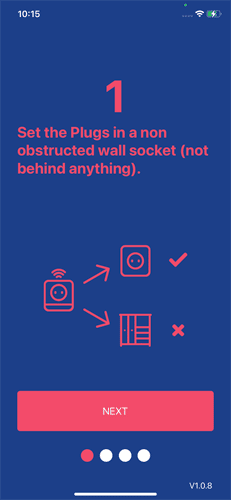
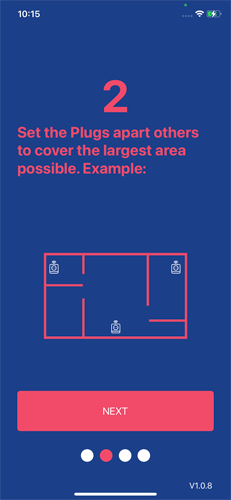
Once the Dcare Plugs Plugs have been correctly matched, the next step is to position them effectively in the home. Ideal placement ensures optimum coverage of every room in the building. Ideal placement is based on the following criteria (see images below):
- Place all Dcare Plugs Plugs as far apart as possible, covering as much space as possible between them (see example illustrations below).
- Avoid installing the Dcare Plugs in rooms that are not used very often or where people only pass through (night hall, toilets, hallway, etc.), or far from rooms that are used the most.
- Position the Dcare Plugs on walls, preferably unobstructed by furniture or any other obstacle.
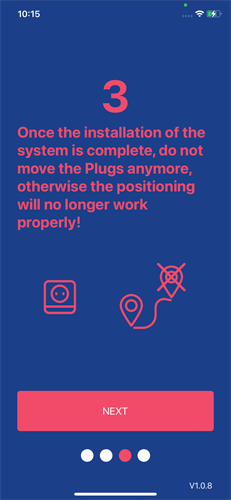
- Once installed, do not unplug or move the Dcare Plugs again, otherwise you will lose the optimal functioning of the system.

7. Learning about the environment
Once the Dcare plugs Plugs, you need to calibrate the positioning. In other words, you need to teach your Dcare Plugs which positions correspond to which parts.
Start by touching the "+" button to select the type and name of the rooms you wish to teach the system. Once done, touch " Confirm "and confirm.
Here are some recommendations for rooms to enter:
- Enter only rooms that are used regularly (living room, kitchen, bedroom, etc.).
- Rooms with little traffic (night hall, laundry room, pantry, etc.) or very small rooms should not appear.
8. Rooms learning
The learning page then takes up each of your pieces to "teach learning The learning page then takes up each of your parts and "teaches" them via an individual button at the end of the line. To do this, touch the dedicated button for each part entered in the previous step.
Learning is done piece by piece starting from the extremities (bracelet by hand at arm's length) then gradually approaching the center (spiral movement) for about 30 sec. until the green light on bracelet goes out. The following calculation may take a few minutes.
At the end of each room "learning", tap " Next room ". Repeat the operation for each room entered in the previous step.
On the finalized summary screen (a green tick next to each part listed), you can add a forgotten part, delete a part, or redo the learning process via the edit menu, accessible via the 3 dots at the top of the page. Otherwise, touch " Finish" .


9. Adding supervisors
Your Dcare system is now configured.
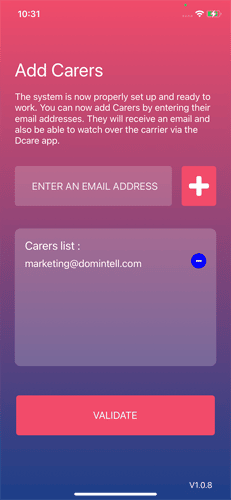
You must now enter the " supervisors " of your Dcare bracelet wearer (and choose whether or not to be one yourself).
The designated persons will be able to access the wearer's follow-up via the Dcare application. By entering their email address, they will receive an email from the Domintell Cloud service asking them to download the application and create a Domintell Cloud account with the email address concerned.
Note that the email address entered here will be the one used by the designated supervisors to create their Domintell Cloud account.
Tap " Validate "to continue.
10. Wearer information
Finally, for each Dcare bracelet scanned, enter the name of the wearer as well as the phone number that will be assigned to him/her.
This number will be used to call the wearer via a shortcut in theapplication in case of problem.


11. Customization of features
For this last step, theapplication offers you to customize the features of the system that might not be relevant to your loved ones.
Tap the slider to turn each feature on or off.
Exit detection: allows you to receive notification when the wearer leaves the home and when they return.


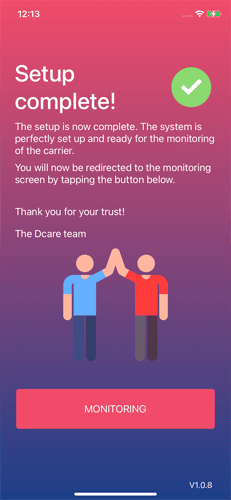
12. Installation complete!
Congratulations! Your Dcare system is now properly installed and configured. You can now begin caring for your loved one.
End by tapping " Follow-up ".
